
This post contains affiliate links and/or links to my own products. I never recommend anything I don’t love or wouldn’t use myself.
So you want to do it yourself when it comes to wedding invitations? Well you’ve come to the right place. In addition to writing Loud Bride, I am a professional designer of wedding stationary. I’m going to share all of my tips to get a luxury look at home with less money. If you have a little bit of time and a creative streak you’ll have no problem at all.
As a general rule, you can make your own invitations at home. You don’t need a design degree or special equipment for most invitations. Even when using materials like acrylic, magnet-backed paper or wood, with the right instructions it is easier to do at home than you might think.
This comprehensive resource gives you all of the information you need to know to make beautiful invitations. From the cost of materials, to the printer requirements, to trouble-shooting tips and tricks, your DIY dreams are just a scroll away. Follow these step-by-step instructions to make and print your own wedding invitations, save-the-dates, and more:
Start with a template
If you have the design skills to make something from scratch go for it! You still might benefit from some inspiration gathering on Pinterest or Etsy before you begin.
If you’re less design inclined or just want to save some time, check out designs online that you can easily customize. These designs cost anywhere from $2-5 for an individual template or $50-100 for a bundle of all the templates you need to create a consistent look for your wedding.
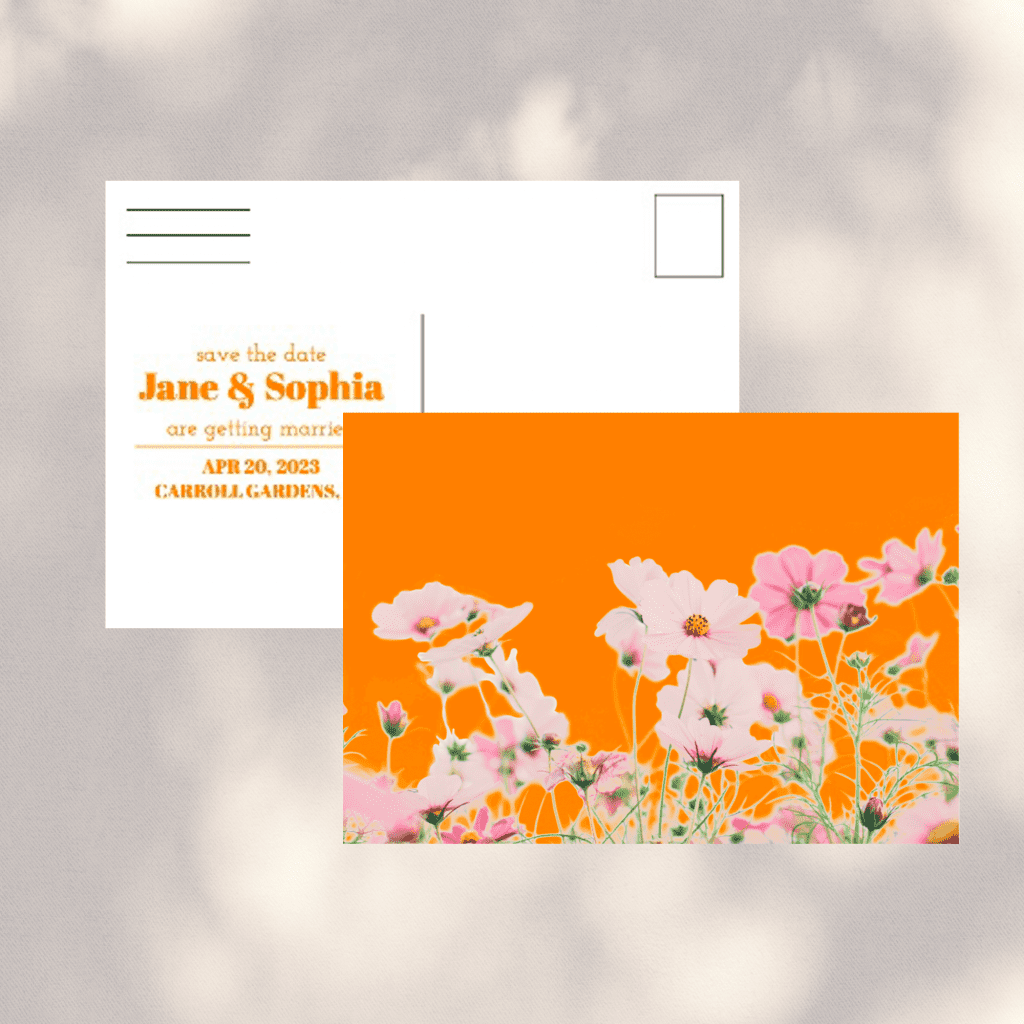
A tip to find a design you can customize is to find a listing on Etsy that says it is made with Templett, Corjl or Canva. All three sites allow you to quickly and easily customize your template and edit it in a browser window. There’s no software to download or design skills to master. When you’re done you can save, download, print and send.
You can also commission an artist or stationary designer to create a one-of-a-kind design for you and your partner. This costs more than pre-designed templates but you’ll have a unique and personalized look for your special day.
Pick your paper
You can get some amazing effects at home with the right paper. If you’re looking for something romantic and sophisticated, try handmade paper or watercolor paper. If you want to keep it modern and fun, try a brightly colored card stock. You can also try something out-of-the-box with alternate materials like vellum, acrylic or wood.
Here’s a detailed breakdown of several popular materials for wedding invitation, the difficulty of printing and cutting the paper, how expensive the sheets are, and where to purchase them.
| Paper Type | Difficulty to Print / Cut (1-3) | Cost ($-$$$) | Where to Buy It |
| Cardstock | 1 – easy for most printers | $ (0.05 per 8.5 x 11″ sheet) | Staples, Amazon |
| Photo Paper | 1 – easy for most printers | $ (0.30 per 8.5 x 11″ sheet) | Staples, Amazon |
| Fine Art Paper | 2 – small learning curve | $$$ (1.77 per 8.5 x 11″ sheet) | Staples, Amazon |
| Handmade Paper | 3 – requires a special printer or tool | $$$ (1.75 per 8.5 x 11″ sheet) | Etsy, Amazon |
| Vellum | 2 – small learning curve | $$ (0.50 per 8.5 x 11″ sheet) | Staples, Amazon |
| Acrylic | 3 – requires a special printer or tool | $$ (1.00 per 8.5 x 11″ sheet) | Amazon |
| Wood | 3 – requires a special printer or tool | $$$ (2.30 per 8.5 x 11″ sheet) | Amazon |
| Magnet-backed | 2 – small learning curve | $$$ (1.80 per 8.5 x 11″ sheet) | Staples, Amazon |
Key things to know about cardstock
The easiest paper to use is cardstock. You can purchase a big stack of it at your local Staples or on Amazon. After printing, you can cut it down to size or buy the exact size you need. You can also run it through a Cricut or Silhouette machine to make custom shapes.
Key things to know about photo and fine art paper
There are other commercial papers that are just as easy to work with. You can find ones that have a subtle texture or multiple colors or a matte or high gloss finish. For example, for a save the date card that has your photo on it, using photo paper will make the invitation look like a professional high-gloss photo print. Or printing a hand-painted image on fine art paper with a dappled texture will look like a watercolor painting.
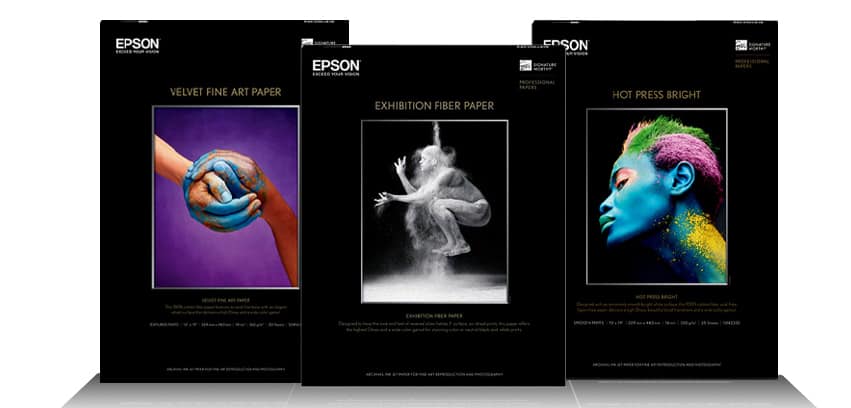
One note specifically about fine art paper is you should find ones that have been created for printers for the most success. General fine art papers for painting or drawing may have finishes that make it difficult for your printed ink to adhere or be too thick to go through your paper without jamming.
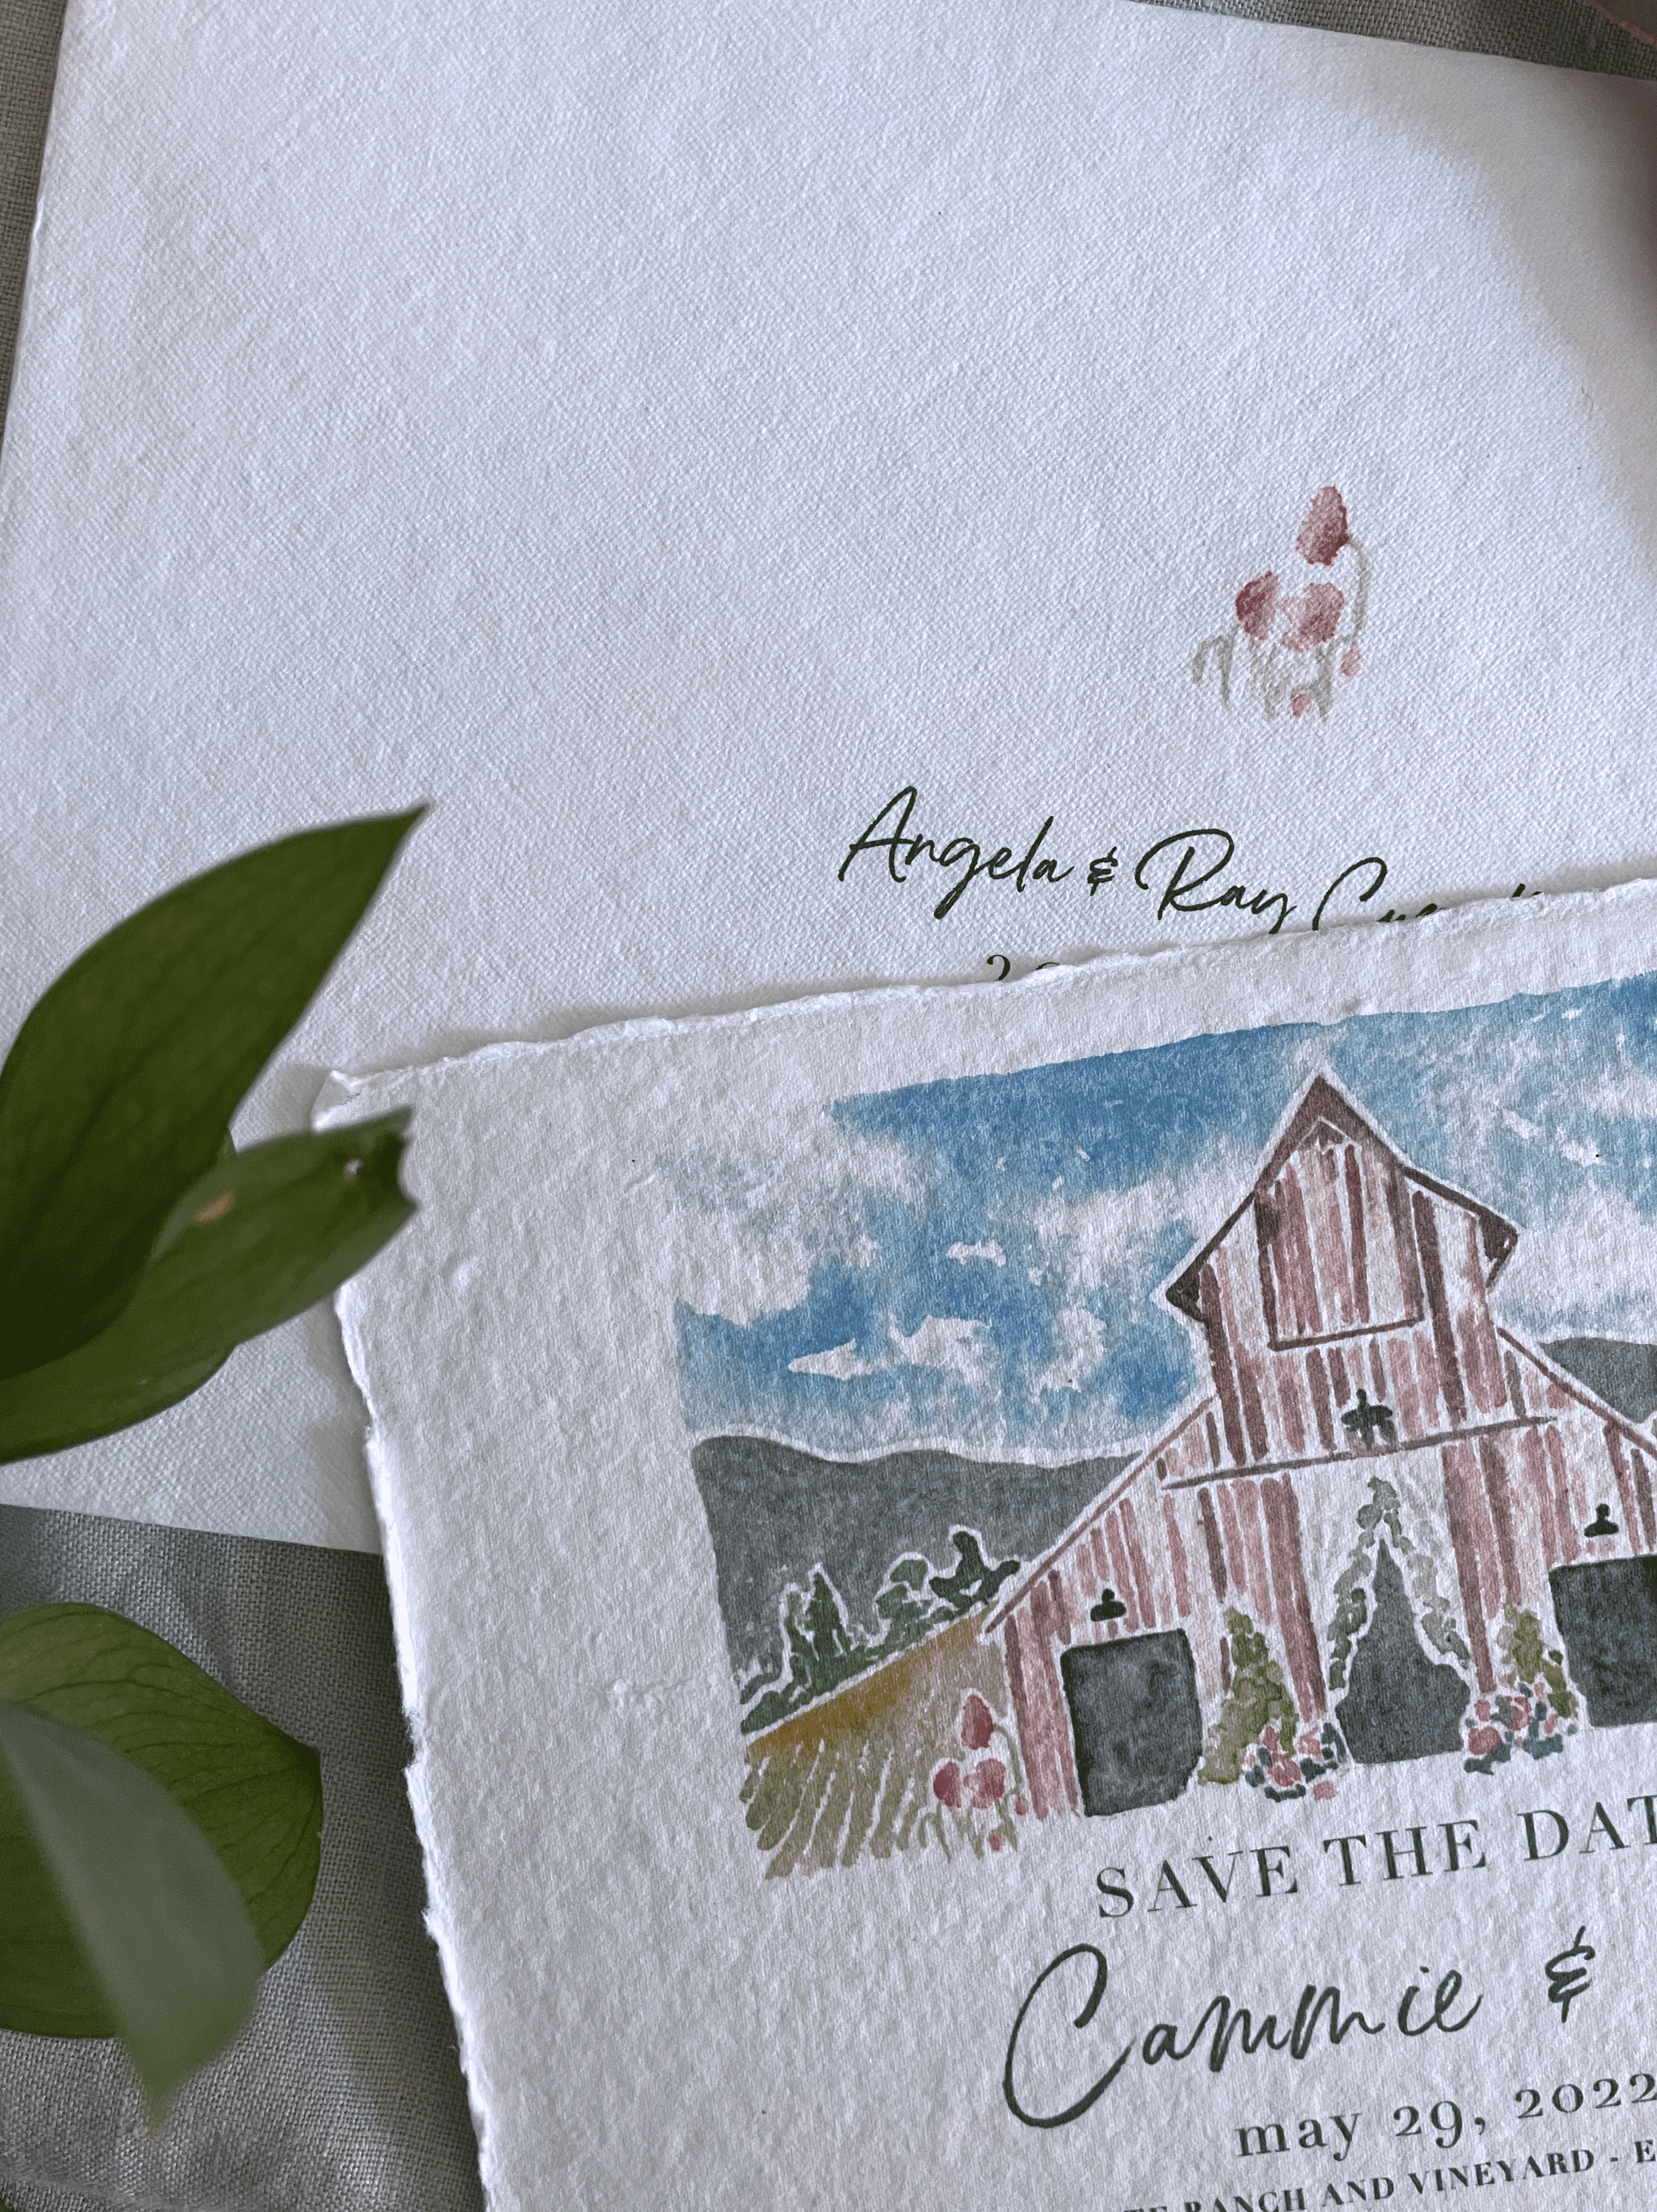
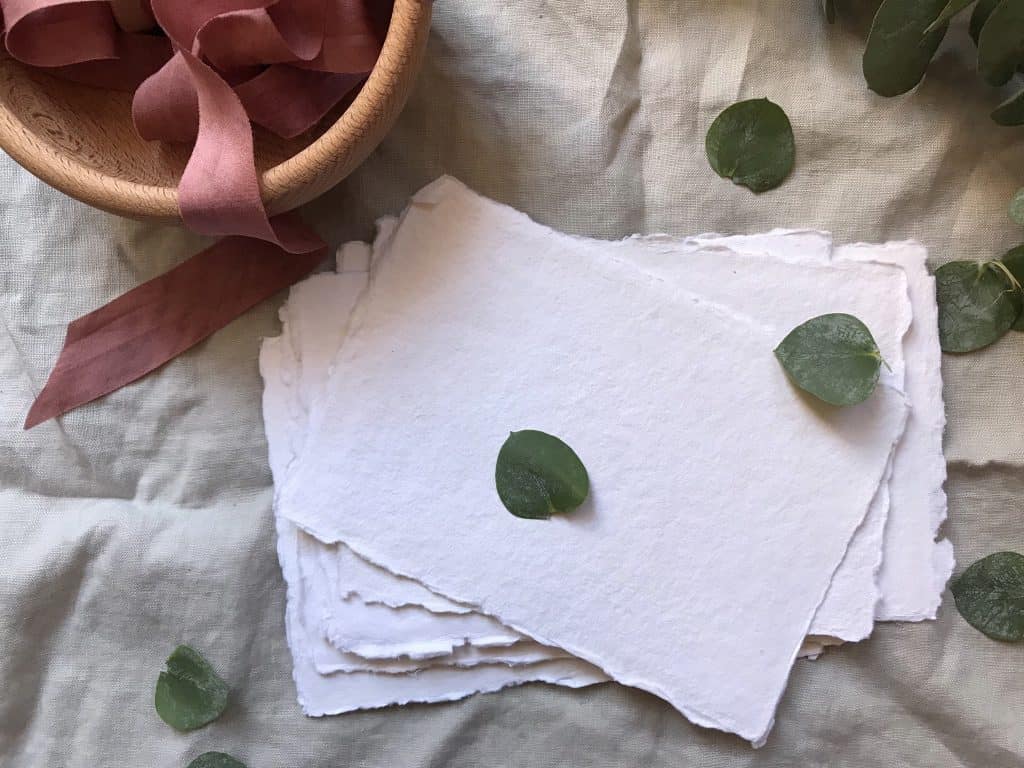
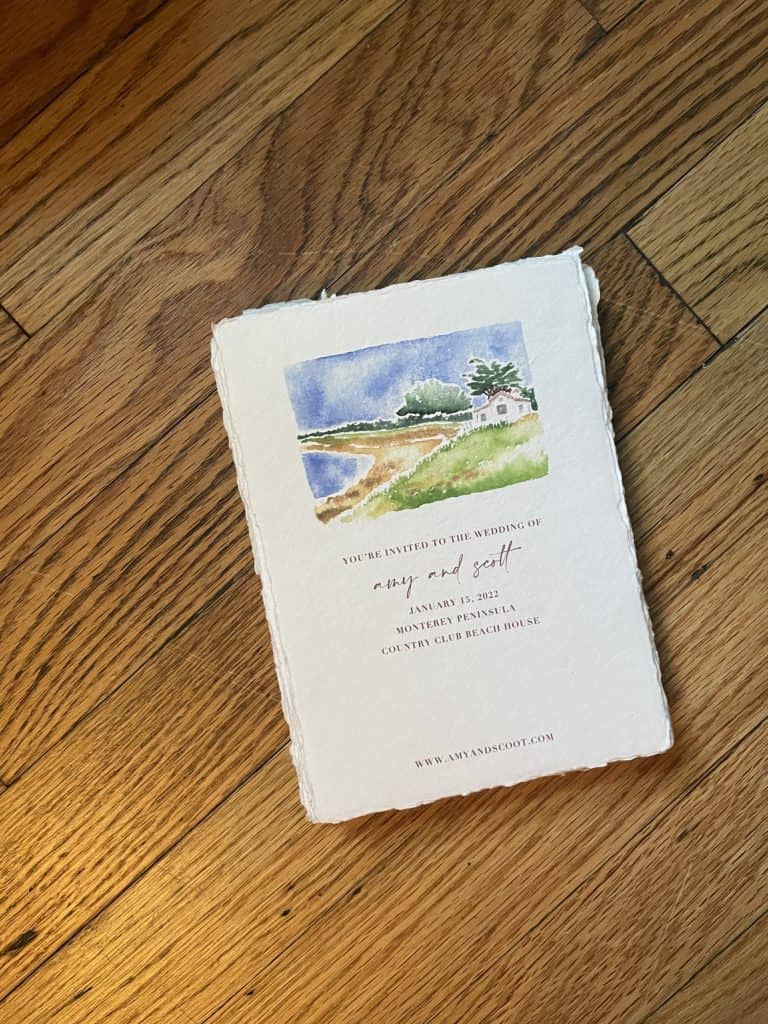
Key things to know about handmade paper
Handmade paper has the highest quality look and feel to it. It typically has naturally deckled or torn edges. An inkjet printer is highly recommended. Laser printing will rub off the paper easily with basic handling. The deckled edges can cause problems for your printer so keep reading for troubleshooting tips on how to print luxury invitations on this material. It’s also a lot more expensive than other types of paper.
Key things to know about vellum
Vellum is a translucent paper. It can be used on its own or combined with other papers to make the invitation. You can print directly on vellum from an inkjet or laser printer.
Key things to know about acrylic
Acrylic is a very popular material for modern wedding invitations and decorations. It comes as a completely transparent piece of thin plastic or you can find it in a variety of colors. You can’t print directly on acrylic. You can write on it, paint it, or use vinyl to adhere text onto it.
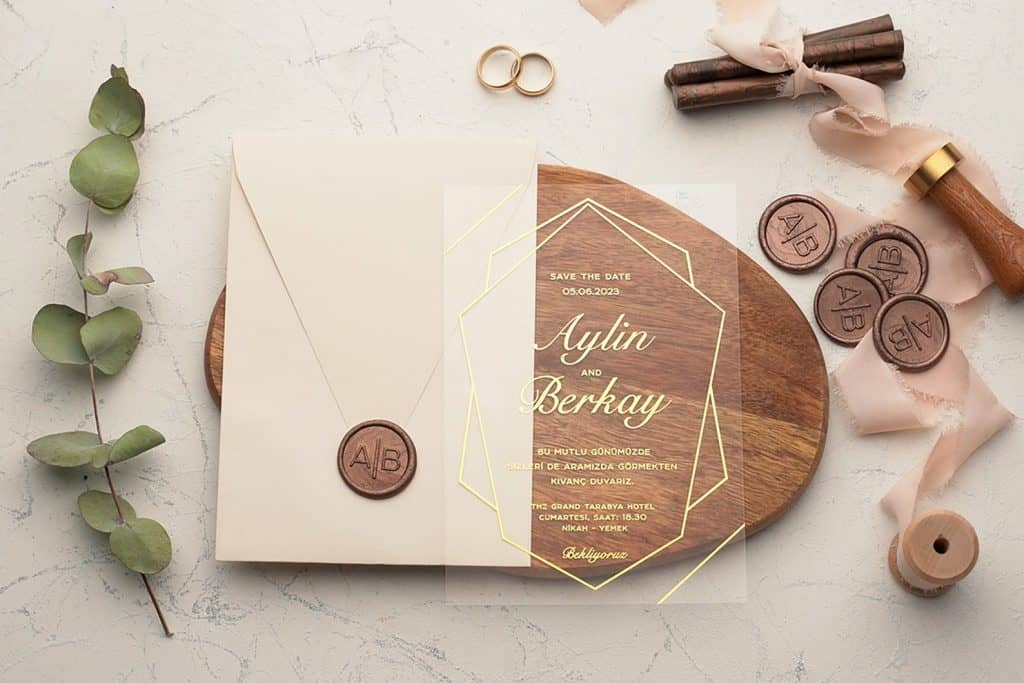
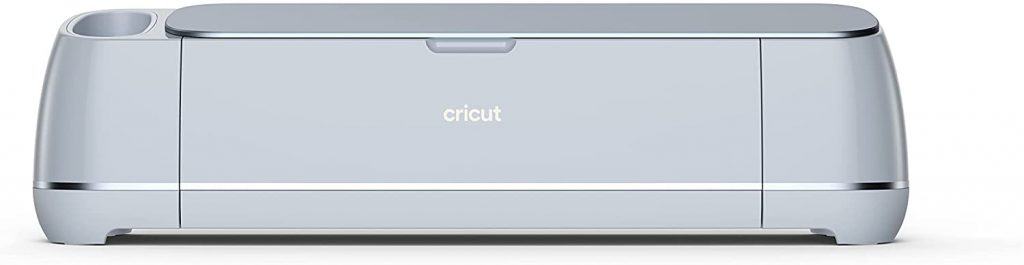
Cutting acrylic requires special equipment if you want a custom shape. Some cutting machines like the new Cricut Maker 3 will be able to cut through thin sheets of acrylic. You can also use a jigsaw.
Key things to know about wood
You can also use the Cricut Maker 3 to cut thin basswood or wood veneer sheets. You can’t feed wood through your printer at home but you can make designs using paint, a wood burning or etching kit, vinyl, or a 3D laser printer like the Glow Forge.
Key things to know about magnet-backed materials
Save the date magnets can be easily made at home. You can buy printable sheets online or at your local office supply store and print on them with your laser or inkjet printer. Then cut the sheets down to size. The results aren’t quite as nice as when you order them professionally but if your printer is a high quality photo printer the results will be close.

Print out a test sheet
Before you hit print on 100-200 invitations, do a test print. I like to print on plain paper first to make sure I know how to feed the paper into the machine and check that there aren’t any major settings out of whack. Then I do a test print on the material I’m working with.
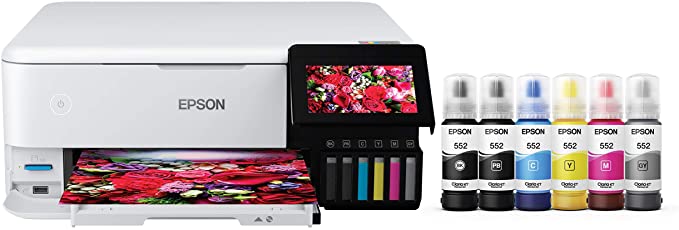
My favorite printer and the one I use for invitations for clients is this one from Epson. It’s under $1000 and will let you print out photos and high quality prints for years to come after your wedding.
If you’re looking for a more affordable photo printer, here’s a more entry-level model from Epson that starts at $299.
Make sure you buy a few extra pieces of the material you’re working with to compensate for any mistakes. 10-20% more material is a good guideline to follow.

One tip to save money is to buy large sheets of paper (Letter 8.5 x 11″ for example) and print multiple invitations on the same sheet of paper. You can fit two 5 x 7″ invitations on a standard US size Letter paper. And four 3.5 x 5″ response cards on one Letter paper.
Print out the full suite
Now that you’ve come this far, you’re ready to print! Some materials can be more complicated to print at home so here are my troubleshooting tips to print on any paper successfully:
For paper jams, try feeding your paper through the rear / top manual feed. It will take longer to feed it through manually but it’s usually a more direct route through your printer.
For ink smudging, try adjusting your printer settings. Telling the printer you’re printing on thick paper, envelopes (even if you’re not!), and slowing the drying time or print density can all reduce smudging.
If you’re printing a lot of invites at once and starting to get jams and smudges mid-way through the project, take a break and let your printer cool down for a while.
Make sure your paper is flat. Curled paper or edges are more likely to get stuck or pick up smudges. You can iron papers on low heat (put parchment paper on top so you don’t scorch or stain the paper) or put them under some heavy books for a few days to flatten out.
For double-sided designs, make sure everything is centered horizontally and vertically for both the front and the back designs and that you’re feeding the paper the right way through the machine. This may require you to print it a few times and adjust your settings or design until you get it right. Hold your card up to a light source to see if the design is matching up before you cut it.
Cut the paper to size
Cutting cardstock, fine art paper, photo paper or vellum:
When cutting paper and other materials at home, there are a few tips you should keep in mind:
If your invitations are squares or rectangles, you can use a paper cutter like this one from Fiskars on Amazon. They are relatively inexpensive at Staples, Amazon, or even your local CVS or Walgreens pharmacy. If you purchased a design, it may have cut lines that you can use to guide you where to cut.
If your design does not have cut lines, use a ruler to measure the length and width of your final result and mark it with a light pencil dash. You don’t want to make a full line down the page because it will be harder to erase. A small dash or cross will do to mark the edges.
Do not use scissors or an exact-o knife. You’ll have a hard time getting perfectly straight lines and edges.
Cutting handmade paper
To achieve the deckled-edge look, you have two options. Purchase and print on the final size paper (e.g. 5 x 7″ paper for invitations) or buy larger paper and tear it down to size. To make tearing a straight line easier, make your measurements and score the paper along that line either by folding the paper multiple times back and forth or with a scoring knife to lightly cut the surface of the paper about half way through with an exact-o knife. You don’t want to cut all the way the paper.
Once you’ve scored the paper, I like to add a little bit of water with a paint brush along the line to make the paper tear softer. The damp paper will tear more naturally this way.
To tear, put the paper on a flat surface with the design face up. Place a bone folder or other flat, dull edged object (light a book or even your phone) on the side of the line you want to keep and press down. Gently pull the edge of the paper diagonally up towards you and the edge of the object to tear the paper in a straight line. This will give you an imperfect edge with the raw edge facing you.
Cutting acrylic, wood, or custom shapes
Depending on the cutting machine you have at home, you can use a Cricut or Silhouette to cut thicker materials or custom, more complicated shapes. The Cricut Maker 3, for example, can cut 300+ materials, including leather. The material has to be relatively thin for it to work with traditional cutting machines.
If a cutting machine is not an option, you can use a jigsaw on many of these materials.
Alternatively, send your design to a local print shop
If you don’t have a printer or it isn’t the right kind, you can print your invitations at a store near you or online print shop. Staples, CVS, Walgreens, FedEx, Kinkos and more offer the ability to print on cardstock or photo paper.
Alternatively, you can upload your design to an online print shop and have it mailed to you. My favorite is MooCards.com. They are known for their unique business cards but also offer stationary printing with a variety of high end papers and finishes. Cheaper options include Shutterfly, Vista Print, and Zazzle but I’m not as big fan of the quality of their printing or that they include their logo on the back of some of their products.
You can read my full review of Zazzle here and Vista print here.
There are specialty printers for handmade paper and other materials as many traditional print shops will not be able to print on non-traditional materials.
This can be a wonderful option to save time and avoid troubleshooting if you have a large number of invitations to send. Give yourself 1-2 weeks for shipping within your timeline.
Address the envelopes
There are a few options to address your envelopes whether you’ve done the rest of the steps at home above or not. Here are all the ways you can print your wedding envelopes:
- If you have neat handwriting you can address your envelopes by hand. Account for a few extra envelopes for typos.
- Find a service to print them for you. Many online shops such as Minted will print the envelopes in addition to your cards for an additional fee. You can also find stores that offer this as a stand alone service.
- Hire a calligrapher. This is an expensive option but very traditional for weddings. You can expect to pay $5 or more per envelope addressed. You can find calligraphy artisans on Etsy or locally by inquiring in Facebook groups.
- Print them at home. Most printers have an envelope setting that allows you to insert standard-sized envelopes into the manual feed. You’ll need to print out a few test ones to make sure you’re inserting the envelopes in the correct direction. You can cut out a piece of inexpensive paper in the right size as a tester sheet until you get it right.
- Use a cutting machine. Again my love of Cricut and Silhouette machines is showing. You can purchase a set of writing pens specially made for your machine and find a font that you love to address the envelopes with. Make sure it’s a writing font that’s compatibly with the pens.
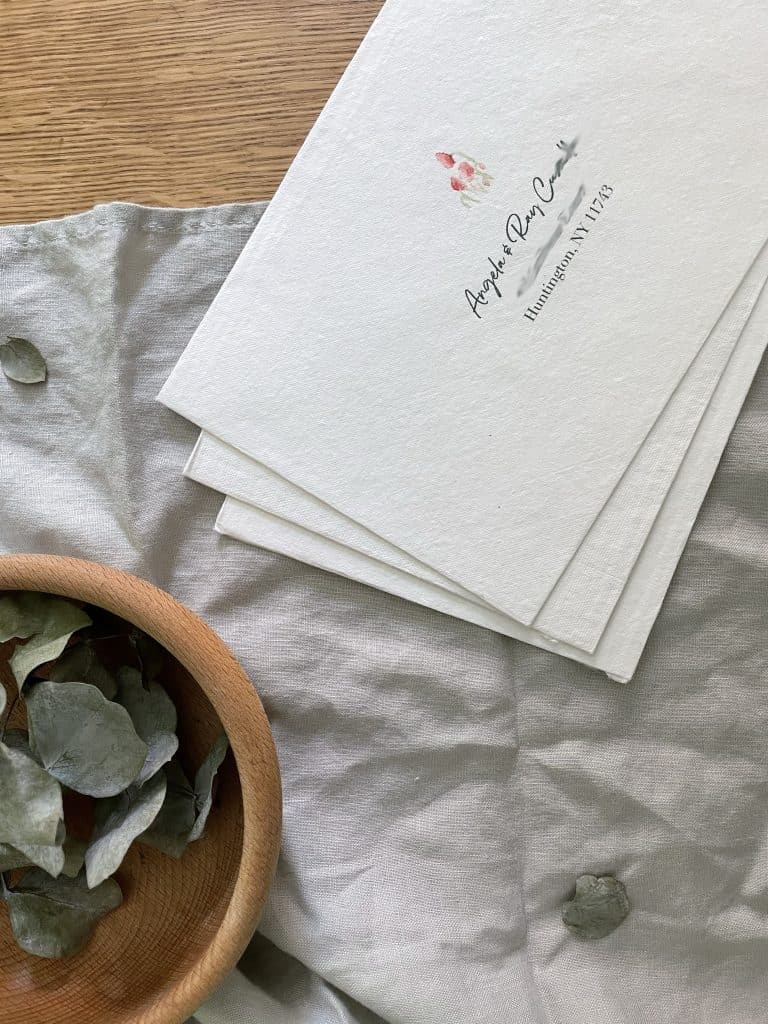
Don’t forget to include your return address on the envelope. The best practice is to put this on the upper left hand corner. Many people put it on the back of the envelopes but this can confuse the postal service machines which address they are sending it to.
When I sent out my wedding invitations I had 1-2 returned to me because the scanner at the post office confused the return address for the destination address when I put my address on the back. Whoops!
Add accessories
Any basic wedding invitation template can be elevated with the right accessories. Complementary accessories like wax seals, stickers, ribbon, envelope liners, envelopes, vintage postage stamps will add a lot of customization. These little touches will make your guests think you spent a ton of money to have a professional design your wedding suite but won’t break your wedding budget.
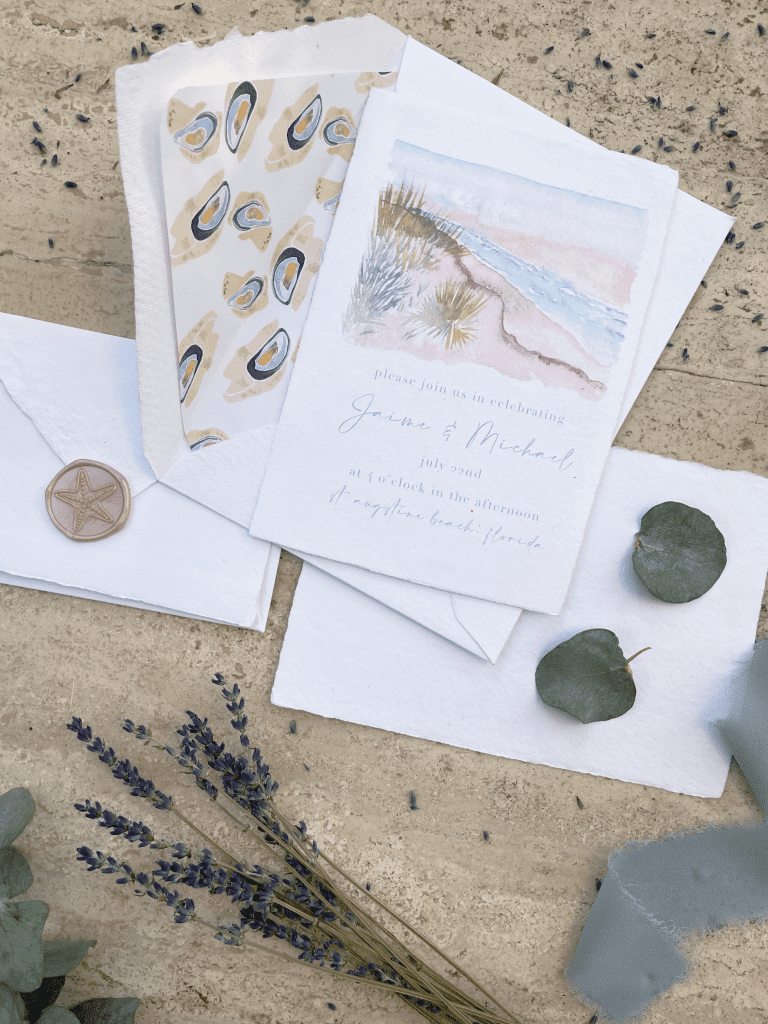
If you do include any of these embellishments on the envelope itself you should enclose it in an outer envelope to protect the design and allow it to easily go through the postal service’s machines for scanning. Since so many things at the post office are automated, things like wax seals on the back can fall off or cause a jam in the machine. You may also need to have your envelopes hand canceled by the post office.
Hand canceling is when the USPS “cancels” or marks your stamps by hand instead of feeding through the automated machine. This is done for envelopes that are overly stuffed or use vintage stamps. This service is not done for free. Your office will weigh each envelope, charge you the correct postage, and a small fee for hand canceling (about $0.21 per envelope.) The fee may be waived by your local postal service if you hand cancel them yourself but you’ll have to ask to find out if your post office allows this.
Shop This Post
If you’re ready to start making, we’ve curated all of the products mentioned here and some more you might need to complete your invitations. Check out our list of recommended products and tools here.
And that’s a definitive guide to making your own wedding invitations. Have questions as you’re making them? Join us on Facebook at Bold on a Budget Weddings to get expert advice, show off your wedding creations, and meet a community of like-minded loud brides.